Description
In this tutorial, we are going to tell you the steps of creating and printing a single envelope. Also, you can save it for future use.
Solution:
To set up a return address:
1. Open “Word.”
2. Click the “File” tab.
3. Then click “Options.”
4. After this, click “Advanced.”
5. Just Scroll down, and under General, type your return address in the “Mailing address” box.
Note: Word will store the address so that you can use it for inserting in your return address.
6. Now, click “OK.”
To verify printing options:
1. Go to “Mailings” tab and create group.
2. Then click “Envelops.”

3. After clicking “Options,” click “Envelope options” tab.
4. Choose the matches as per the size of the envelope from the “Envelope size box”. If you don’t find any choices which can match your needs then scroll down to the bottom of the list to click “Custom size.” Here, you can type the dimensions of your envelope in the form of Width and Height boxes.
5. Now, click “Printing Options” tab.
6. The Word will get the information from the printer driver that in which way the envelope should be loaded into the printer. Afterwards, this information is displayed in the “Printing Options” tab of the “Envelope Options” dialog box.


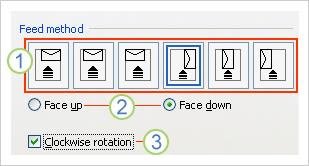
Feed Method
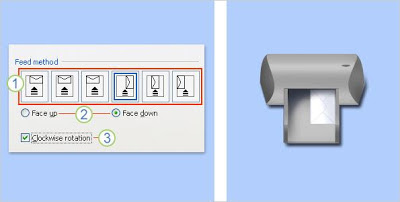
Through Feed method, you can determine the position of the envelope as well as whether the long or short edge is being fed into the printer. Envelope can be face up or face down. On the face, the address is printed. If the envelope is fed short edge first then you need to rotate the envelope to prevent the text from appearing upside down on the envelope face.
As per the illustration below, the envelope should be placed to the right, face down, flap at the top and the short edge is being fed into the printer.


Load the envelope as indicated in the dialog box. Then click “OK.” By typing some test text into the “Delivery Address” box, click “Print” to print the envelope.
Verify that whether it is printed correctly or not. If not then perform the below steps:
• Check your printer information
• Update your printer driver.
• Go back to the” Printing Options” tab of the “Envelope Options” dialog box, and adjust the printing options. Print it again. Keep repeating this until you find a configuration of printing options that yields the results that you want.
Create and print or save an envelope
1. On the “Mailings” tab, in the Create group, click “Envelopes.”


2. Type the mailing address in the “Delivery Address” box.
3. For using address in the electronic address book which is installed in your computer, click “Insert Address.”
4. In case, you want to format the text then select the text, right-click selected text and click “Font” on the shortcut menu.
5. Type the return address or use the preconfigured one in the “Return address” box.
6. For using address in the electronic address book which is installed in your computer, click “Insert Address.”
7. For keeping return address for future use, select the “Omit” check box. This will not include it in the current address.
8. If you have electronic postage access then you can add it to your envelope as per the below steps:
· Choose the “Add electronic postage” check box. If you don’t have installed electronic postage program yet then Microsoft Word asks you to install one.
· For setting up options of electronic postage programs installed in your computer, click “E-postage Properties.”
9. Perform the below steps:
· Without saving an envelope for reuse, insert an envelope in the printer and then click “Print.”
· In case you want to save it for reuse then click “Add to Document.” Click the “File” tab and then click “Save As”. At the end, type a name of the document.
Now, Word adds the envelope to the current document as Page 1. To print the envelope, insert an envelope in the printer. Then click “Printing Options” tab in the “Envelope Options” dialog box. After that, click “Print.”
Hopefully, by now you have understood the steps of creating and printing envelope. For more suggestions, contact Techvedic’s computer support helpdesk, as per below contact-details:
U.S. +855-859-0057
U.K. +800-635-0716
CA 1-855-749-5861
AU 1-800-197-298
We would be more than happy to help you. We are available 24/7.


0 comments:
Post a Comment