How to Customize Your Windows 8 Start Screen?
Keywords: Customize Windows 8 Start Screen, personalize windows 8 start screen, configure windows 8 start screen, windows 8 logon screen, windows 8 start screen background
Description


Solution:
1. Configure colors and images from the Charms bar

Tap on the “Settings” icon present at the bottom of the charms bar. After that, tap on the link saying “Change PC settings.” The option under this is “Personalize.” On the right pane, you can see the settings available to personalize. On tapping “Lock screen,” an image is displayed when Windows 8 is locked. By choosing from the bottom, you can make certain apps working while the PC is locked. “Account Picture” lets you select a photo for your account. Tap or Click “Start Screen” for choosing a color scheme and background.


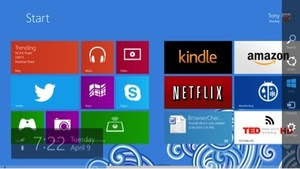
2. Create your own mosaic with Windows 8 Tiles
In Windows 8, new icons are added as a tile to the start screen. Whether you download and install apps from the Microsoft Store or install legacy Windows software, the shortcut icons always get added in the form of new tiles. For managing the Start screen, you need to organize tiles in a proper way. But, the best thing is, you can decide that which app you want to arrange as a tile on the Start screen, drag the tile to organize it and modify its size. For some default apps like Mail, People, Calendars and Bing, you have limited options. You can remove the tile from the Start screen, uninstall the app, change the tile size or turn live tiles on or off.


Just unpin all of the apps which you don’t want to be displayed on the Start screen. These apps will remain available but their tiles won’t appear on the Start screen. By right-clicking multiple tiles simultaneously, select “Unpin” from Start to remove all of them. Organize the tiles by moving them and keep only those tiles which you frequently use. This makes your Start screen more customized. Also, you can resize some of the tiles.
Well, this is all you need to customize Windows 8. Just do it now!! For more suggestions, contact Techvedic’s computer support helpdesk, as per below contact-details:
U.S. +855-859-0057
U.K. +800-635-0716
CA 1-855-749-5861
AU 1-800-197-298
We would be more than happy to help you. We are available 24/7.


0 comments:
Post a Comment